
To get under the front transport cover on a Studer A810, specifically in this case to change out the left and right tape tension levers, the following materials are required
- metric set of Allen screwdrivers
- Philips screwdriver
- small set of needle nose pliers
- black Sharpie
Here’s how to do it:
Take the back cover of the machine off.
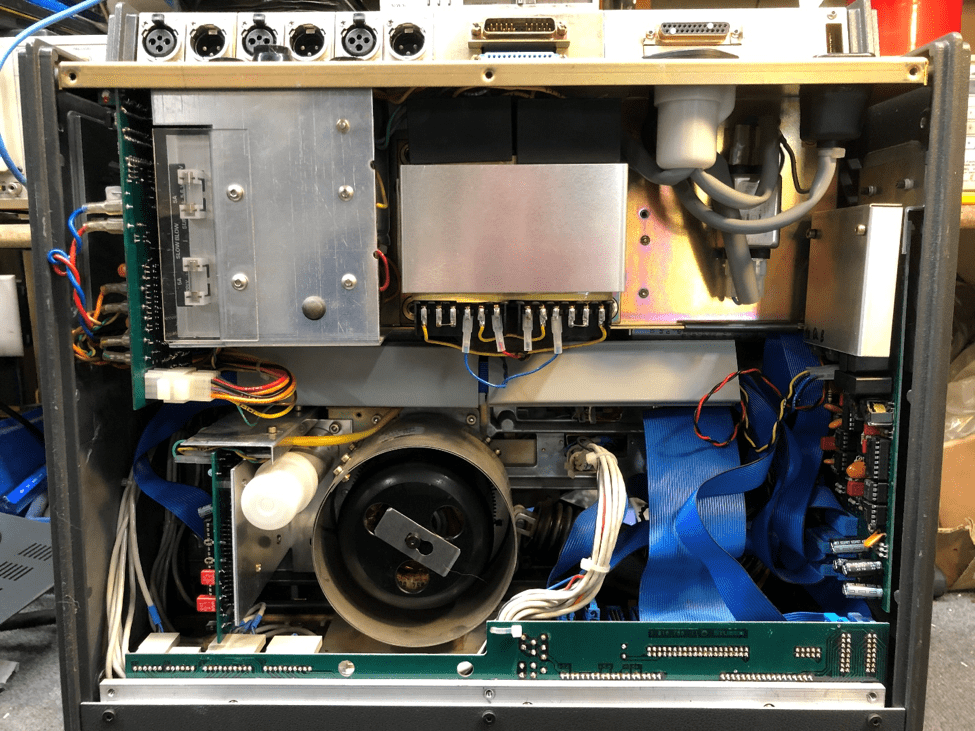
Place the deck on its back, and remove the head cover with the screw on either side of it.
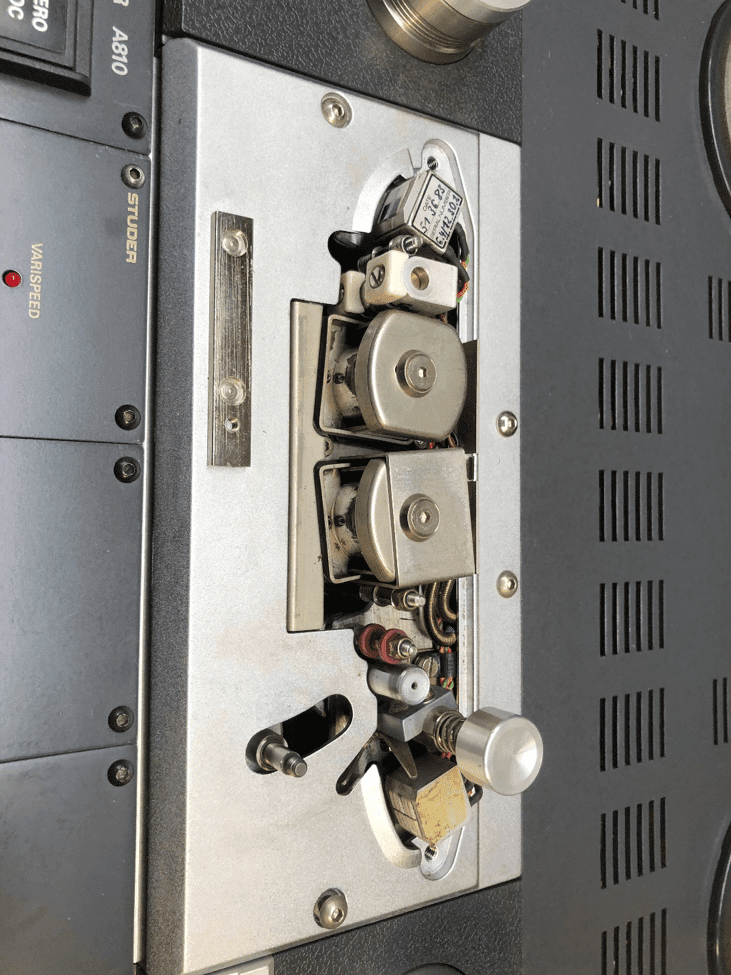
Loosen the 4 screws around the head stack trim. The screws are locked in place with a washer on the underside, as long as those are all intact, the screws will loosen, but will not be able to be removed from the cover.

Remove the screws around the plastic trim pieces around the tape tension levers and pulley. There’s a trick to the right side one.. the one Allen screw is located in the hole of the splicing block as shown below. Unscrew the two metal caps so you can remove the small pulleys on the tape tension levers.

Remove the main front cover of the transport, then the two smaller covers over the tape tension levers will be able to be removed as well.

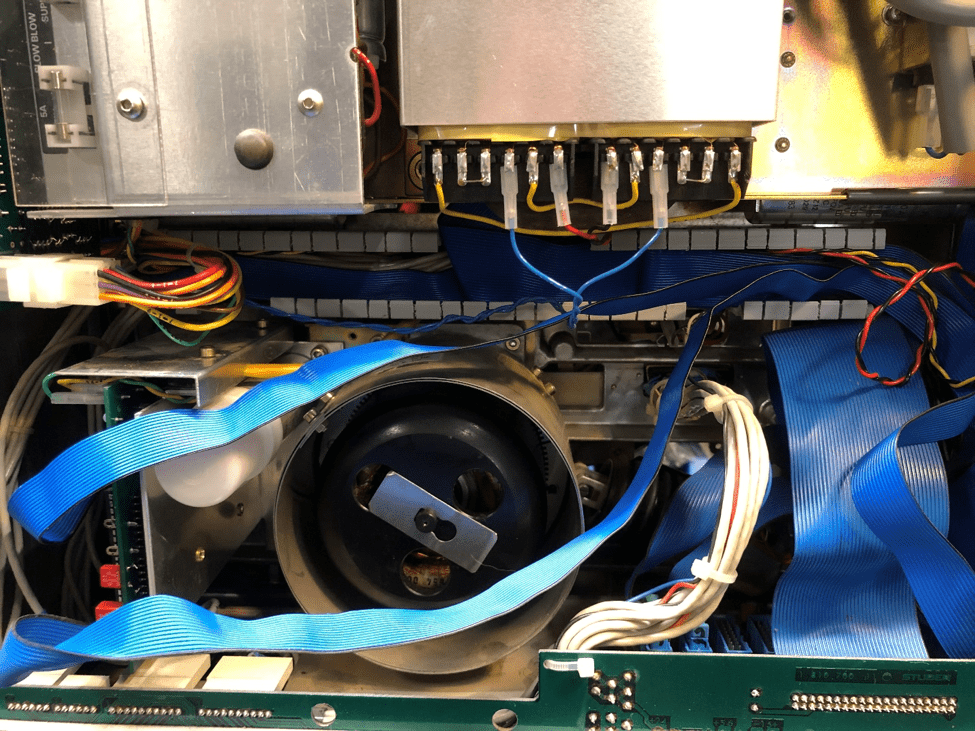
There are three Allen screes around the large idler pulley as shown below. Take out two of the screws, leaving one in place.


Turn the deck around, and remove the wire ducting covers as shown. They snap onto the wire trays, a bit of force may be needed to pull them off.

The tape tension levers connect to the reel motor drive board, and are the bottom two ribbon cable connectors as shown below. Mark the two ribbon cable connectors, as it is important as to their orientation when you reassemble the deck.


The ribbon cables snake upwards, and the left tension lever (supply reel) has a shorter ribbon cable than the right one (takeup reel). Free the ribbon cables so that they can be fed through the chassis when you remove the tape tension assemblies. The takeup tension arm ribbon cable is fed through the wire tray, and may be buried under other wiring or ribbon cables. The order in which the cables are in the tray are not important, so push any removed ribbon cables back into the tray, so that the left tension ribbon cable is at the top when you reassemble.
Now move back to the front of the deck, and undo the last screw holding the tension lever assembly in place. The tension assembly should now be free, and pull it upwards, to snake the ribbon cable through the deck.
There is a pair of green and black power wires going to the small solenoid at the bottom of each tension arm assembly. Use a pair of needlenose pliers remove the two wires from their single connecting pins. You may need to use a small screwdriver to pry off the connectors from the pins, as they may be stiff. Note the color of the wires and the orientation on the solenoid, the deck will smoke if they are reversed during reassembly!

The installation of the replacement tension levers is the reverse of the above procedure.