

The most fundamental, necessary part of owning a reel-to-reel tape recorder of any kind is to clean the heads and tape path regularly. Here is our guide to Reel-to-Reel Head and Tape Path Cleaning.
The rule of thumb at a recording studio is to clean the tape path before every recording session – and that is with usually using new tape! Even a new tape can shed a tiny bit of oxide, which can affect tape performance. With most people, running used tape that can be up to 60 years old, it’s mandatory that the tape path be cleaned often.

What you need for tape path cleaning:
- 99.9% pure isopropyl alcohol
- Cotton swabs (wood stick double ended ones is what we use, found at electronics stores)
- Screwdriver as required to remove the head cover
- Old toothbrush
- Compressed air (optional)
DO NOT use:
- Rubbing alcohol
- Sandpaper
- Soap and water
- 150 overproof moonshine
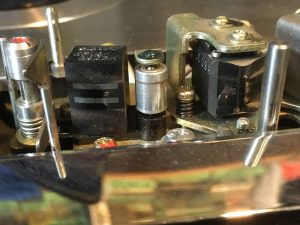
Here’s a picture of the head stack and tape path on a Sony TC-377 deck that we recently got in with a bulk purchase. Here we see the left tape guides, the erase and record heads. The playback head is to the right, just outside of the picture. With this deck, the plastic cover over the head assembly pulls off without the need of a screwdriver. This deck actually had less gunk on the heads than we typically find, but you can see oxide deposits on the head, and a bunch of oxide that has stuck to the heads and tape guides around the tape path.
Using the cotton swab dipped into the alcohol, shake off the excess, and start rubbing the cotton swab over the tape path, starting from the left to right to make sure you cover all areas, and rub sideways, or up and down. It’s important to clean everywhere the tape touches, but also above and below the tape path, as oxide can fall off the tape, and gunk up the area around the tape path.

Rotate the cotton swab as you go, and keep in mind that running a dirty cotton swab over a clean area will most likely deposit more gunk onto the tape path than it takes off. Keep cleaning the same area until the cotton swab comes away clean. Use as many cotton swabs as you need to.
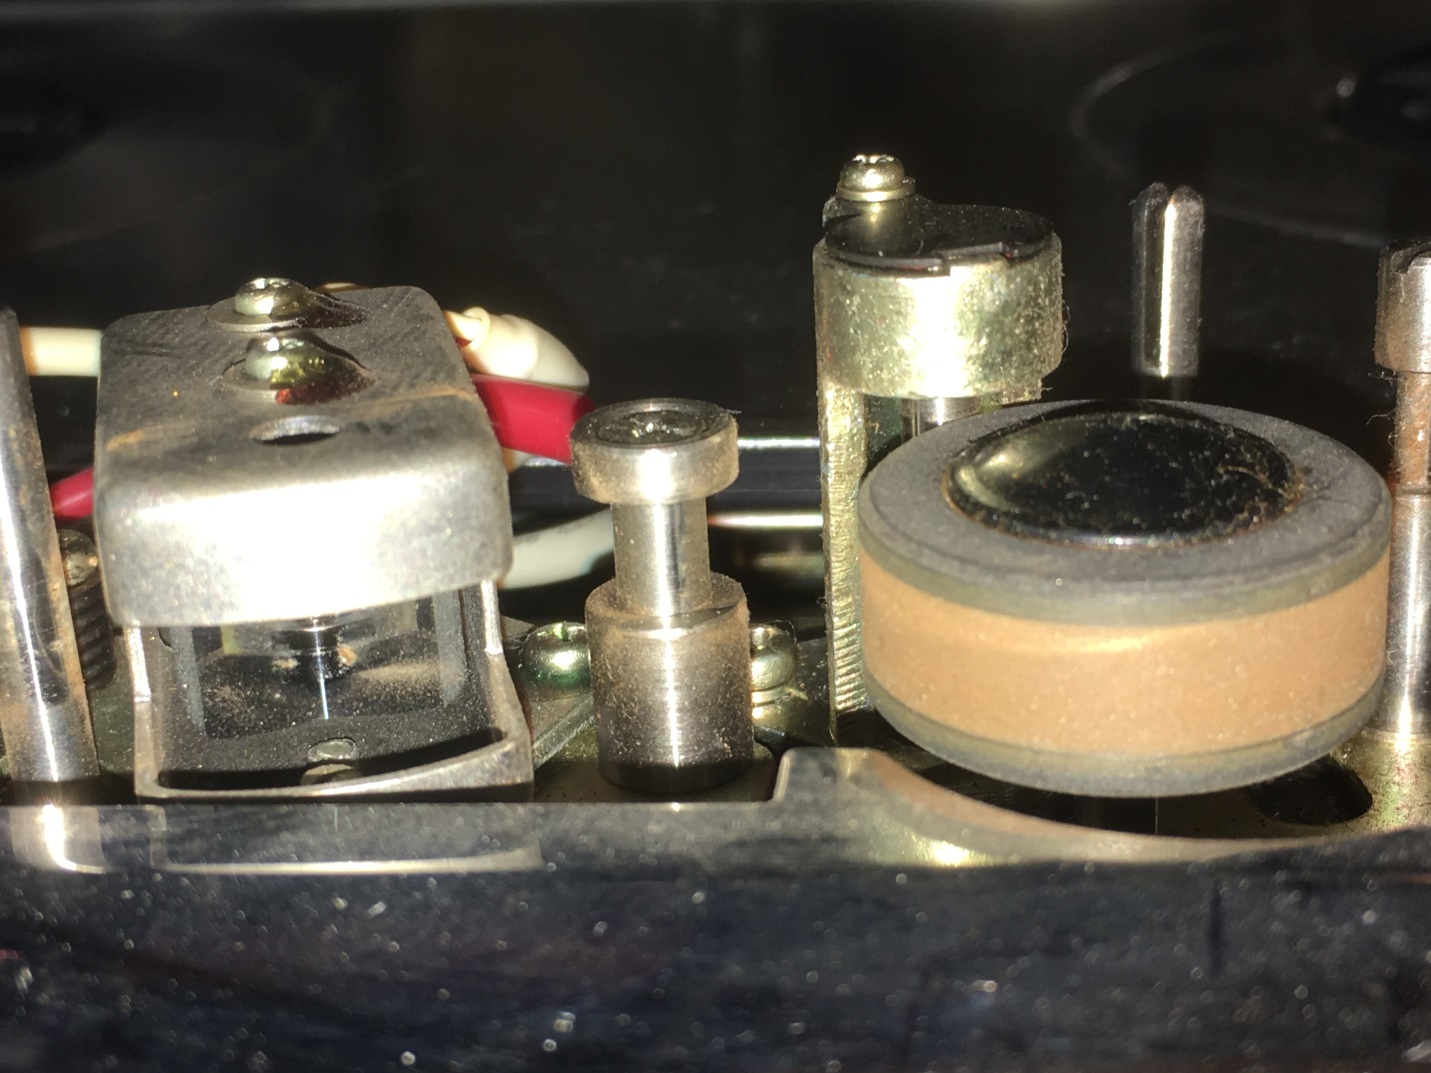
This particular Sony deck has a little metal roller as part of the tape path, and it needs cleaning as well. Clean anywhere that the tape touches, even the rollers that give little friction to the tape itself.
With a properly set tape head, it’s very difficult to knock it out of alignment, so feel free to put on some pressure behind the cotton swab to get rid of hardened oxide on the heads or tape path. DO NOT use a screwdriver or other tool to chisel away stubborn dirt! While it might be tempting, you’ll scratch the head, which is never a good thing.
Here’s why we put the green tape on the machine in a previous picture of tape path cleaning: The Sony deck will stay in the ‘stop’ mode if the tape sensing lever isn’t triggered, and the pinch roller remains hidden. A lot of Sony decks do this, so people don’t clean years of oxide buildup on that pinch roller.


Short of getting the rubber roller rebuilt, there’s a good chance you won’t quite get every last bit of oxide off the roller, but this is much better than it was.
Once the tape path cleaning is complete, feel free to use a can of compressed air (or an air compressor set to approximately 20 PSI to clean the oxide and dirt that has fallen under the heads and head stack. You can use an old toothbrush soaked in the isopropyl alcohol to loosen and clean up the dirt as well. Using a glass cleaner like Windex on the deck itself is fine, just don’t get any on the heads or the pinch roller.
A few things to note:
Some people say not to use isopropyl alcohol on the pinch roller, as it softens and can damage the rubber. This can be true, isopropyl alcohol can attack rubber, however – and it’s a big however – if a wiping of the pinch roller turns it to mush, as happens commonly with the original Teac and Tascam pinch rollers, it was about to fail anyway. Rubber in good condition will not fail by using ispropyl alcohol on it.
If one or both channels still sound muffled after a first head and tape path cleaning, it is possible that some binder of the tape is stuck onto the heads. We had one Akai GX747 that had a dead left channel on playback a few years ago. We suspected that a sticky tape had been run through the machine, but we cleaned the heads 5 times, and still nothing out of the left channel. Everything pointed back to the head, as the preamp section checked out OK, Finally in desperation, we used a chamois, dipped in alcohol and put our finger behind the chamois, and scrubbed like crazy. Presto, the left channel came back as good as the right one, even though to the visible eye, the head was clean.
There can be any number of other issues other than dirty heads that can cause poor sound in one or both channels.
- Misaligned heads (don’t attempt to fix this yourself unless you have alignment tapes, and know exactly what you’re doing!)
- Worn heads (more on this in another article)
- Worn/warped pinch roller or tape guides
- Problems in the electronics section of the deck
Very importantly, SSS tape can coat a tape path within 30 seconds of cleaning it. More than one customer has brought a machine back after a service complaining that the deck sounded terrible after ½ hour of playing, only for us to find that the tape path was completely coated with oxide and/or binder just by running one tape through the machine. Bake those back-coated tapes!